
One of the goals of the Algorithmic Pattern project is to apply algorithmic knowledge in craft to new scientific or mathematical purposes. One of the people we met when we were working with Geraldine Jones during her residency on the project was Charlotte Megroureche from the Education and Social Research Institute at Manchester Metropolitan University, who was studying how Geraldine understands complex mathematical principles through her craft of wire weaving and Basketry.
This led to a meeting with Ricardo Nemirovsky and a workshop where we explored tablet weaving with them in March. The interesting thing about this workshop is that we also had a lot of students participate who are learning how to teach mathematics in schools - and so playing with different ways of understanding patterns might be relevant for their later careers. This workshop had a slightly different approach from the many tablet weaving workshops we've done in the past, where we've worked with musicians and programmers and shown them a new way of making patterns - this time we were looking for the mathematics behind the complex structures and patterns that arise.
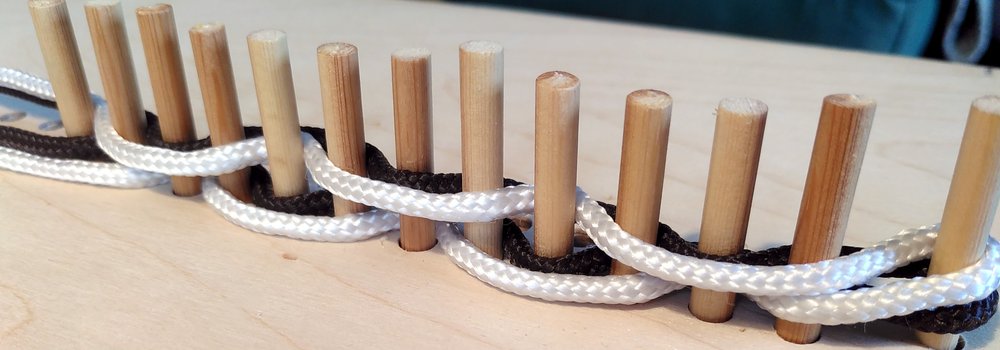
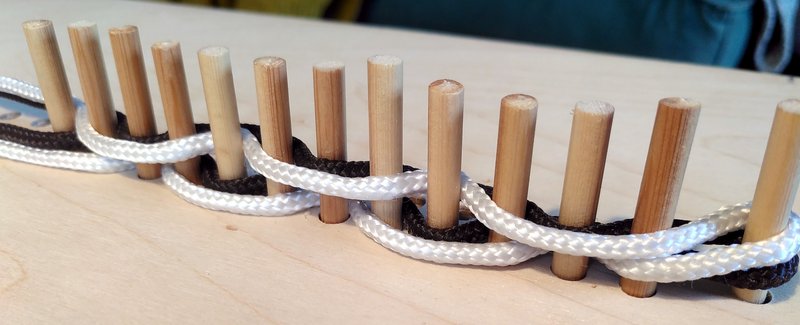
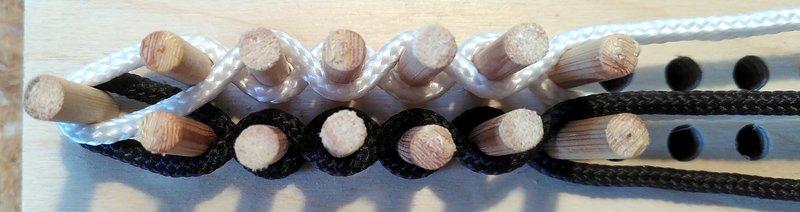
One of the things we discussed was constructing a version of the tablet weave demonstrator described by Peter Collingwood in The Techniques of Tablet Weaving. This is probably the most complete book on tablet weaving, and the device he describes is the one he built for drawing the many illustrations of weaves within the book. It's a single tablet (although more can be used) held under tension on a board with a warp of thick threads. Instead of weaving weft threads through the warp, you insert pegs into the board at spaced intervals. This means we can easily see the internal structure of the weave as you build it up.
This may be a useful tool to help provide deeper understanding during workshops, with much less untangling required! We've done a lot of work previously on simulations of tablet weaving, but having a physical one has a lot of benefits.
We cut the holes using a CNC machine to make them uniform, and based both the choice of diameter of the dowel and the spacing on the thickness of the thread we are using. The cord we are using came from our local Cornish chandlery, with it's vast selection of ropes - which has been useful for this project! It's important that the warp matches the weft-pegs and produces a more balanced weave, similar to if you were weaving only with the thread.
Here are some example weaves, based on the categories we used in the 3D tablet weaving simulator - it's interesting to try and replicate this experiment with physical material. These categories are not official, just ones that I've found useful from experimentation.
Type 1: Repeated twists and turn back
Here we weave 4 or more quarter turns forward and then the same number back - this is a 'normal' kind of woven pattern, which results in a strong and reliable structure. What we see when we weave this is stripes (or diagonals or diamonds if the tablets are offset from each other), and you can see how the white and black threads alternate which side they are on. The little white loop on the left and hidden black loop on the right are created when you change direction.
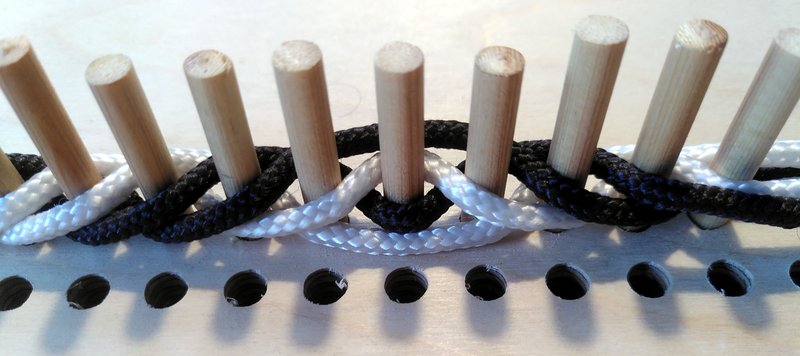
This is a similar weave, but with 8 turns each way, so only one crossover point is visible. You can see at the crossover some of the threads are on one side for three wefts while others only one. This kind of detail is hard to see in a woven braid.
Type 2: Single faced double weave
This weave is created by rotating the tablets 2 quarter turns one way and then back. This results in only a single colour being visible on one side and another on the other, so is often used in making patterns - either for small sections or blocks of colour. I thought that this effect might have worked because only one colour thread was facing one side or another, in fact you can see that what happens is that the in the image above the dark threads are under higher tension than the light threads and so the lighter threads naturally sit on top of them. The reverse is true on the other side:
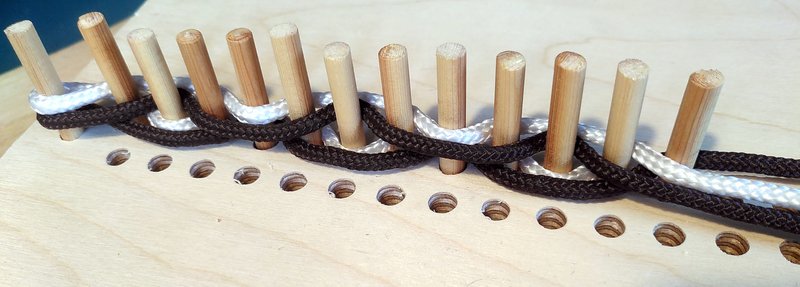
The effect of the tension on the weave is extremely important - often during the process of weaving (no matter which technique) you beat down a weft thread it looks like a mess until the tension 'snaps' the weave together to create the pattern. Using this device you can really see that happening, almost like you are observing it under a microscope.
Type 3: Degenerate floats
The next time is just one quarter turn forward then back. This type of weave is not strictly a weave, as it results in a fabric which is not stable.
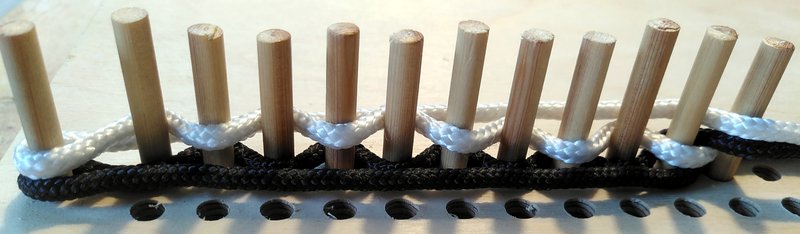
The core of the fabric is woven as plain or tabby weave, but two of the yarn threads are never re-incorporated back into the weave, and 'float' on either side of the fabric. Sometimes this is used for different effects, and the amount you can get away with depends on the material constraints as well as the intended use for the finished fabric.
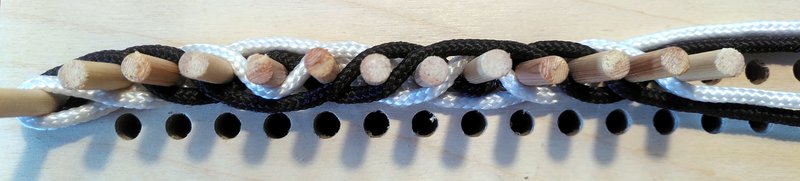
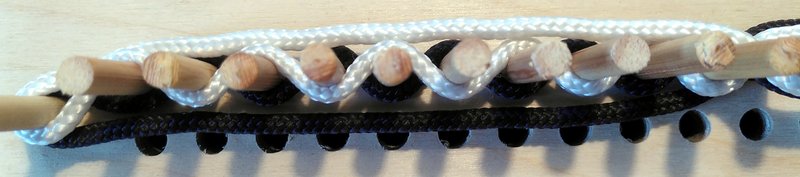
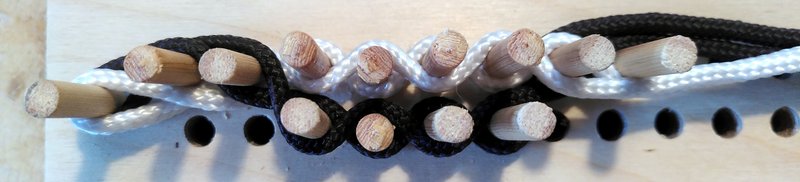
Type 4: "Double cloth" fabric
This is in some ways a variation on type 3 where we add a second weft. This is the reason the device has two rows of holes, this technique (also seemingly called "Icelandic double weave") is done by offsetting the cards at 45 degrees and then rotating them one quarter turn back and forward. This type of weaving was not understood by our 3D simulation, so it's great to be able to see how it works in detail. It creates two parallel plain weave fabrics at the same time which are not attached to each other.
This technique is how we make the Penelopean woven robots, by splitting and rejoining the fabric you can create complex 3D structures (it's a common misconception that weaving is "2D").
This is a small pocket created in the weave, where we start with one fabric, split to two and then back to one again. I need a few more pegs to demonstrate this properly.
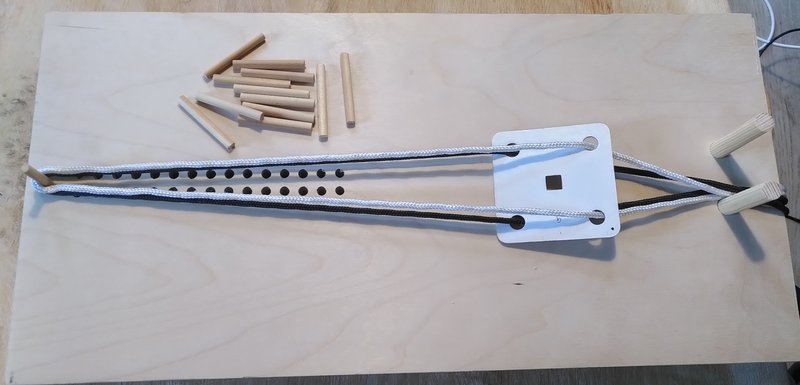
I'm gradually uploading the files and designs I've used for this device here, there are a number of uses for this and directions we need to explore further.
- Is this useful as a demonstration tool in a workshop about tablet weaving, do we just have one, or make one for every participant? Can/should it replace the actual weaving?
- Can we use it to explore more complicated weaves, maybe some of the ones we know about from archaeology?
- From looking at the Collingwood book, I'm interested in the extent that hand drawing might be a better way to document these weaves than photographs or 3D simulations.
Ricardo pointed out that tablet weaving is a potential way to explore some specific mathematical theories, and that this might be a useful tool to start to do that. This also fits with the ancient Greek idea of the fabric of the cosmos being woven, and only understandable through the patterns and interferences of threads.